Add a Customer
Adding new customers to your database is a simple process and as
soon as you add a new customer, you can create service requests for that
customer.
|
Note:
|
In CorrigoNet, customers are part of a work zones, which in turn are part of portfolios. Because of this, you must first create portfolios and create work zones before you can start adding customers. |
To add a new customer, complete the following steps:
- Go to Customer > Search.
The
Customer Search screen opens.
- Use the Scope Selector to choose the work zone,
portfolio, or customer group you want to add the new customer to.
- Select an option from the scope drop-down list.
- Click the Add New button.
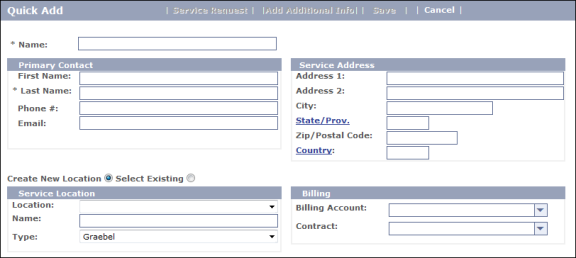
The
Quick Add screen opens. Show me

- Enter a name for the new customer.
- Enter the customer's contact information in the Primary Contact
fields. This
is recorded as the DBA name in the system and is more commonly a company as opposed
to an individual. Be
sure to fill in all required fields, which are designated with an asterisk *.
- Enter Service Location information for the new
customer. The
fields that you see on the screen depend on the settings on the CorrigoNet Workflow Preferences screen, so the following lists all the fields that you might be able to see:
Place the new customer in a new unit. Show me

Place the new customer in a new unit and add
the unit to an existing building, selected from the Location drop-down list. Show me

Place the new customer in an existing location. Show me

- In the Billing field, select the billing account and contract that you want to associate with the new user.
- Click Save when you have entered all of the new
customer information. The
new customer is added to the system and the Add Additional Info button
becomes active in case you want to add more details or edit the ones you entered.