Complete a Work Order
Completing
a work order is one of the last events in the work order process. A work order is ready to be completed when the following are true:
- The work order has a status of Open: In Progress
- All work for the work order
is finished, even if some of it has not been completed successfully
To complete a work order through CorrigoNet, complete the following steps:
- Open the work order details screen for the work order you want to complete.
- In the Work Description region, update the Disposition column for each work order item to reflect its current standing. Show me
-

- Click the Complete
button at the top of the Work Order details screen.
- The
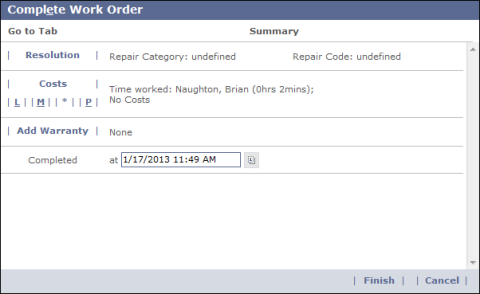
Complete Work Order popup screen appears. Show me
-

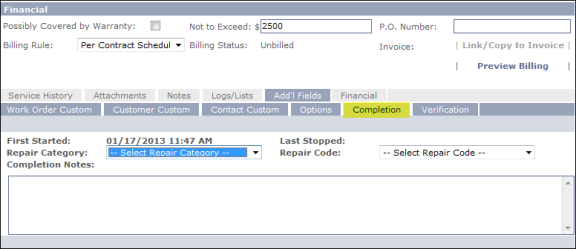
- Click the Resolution button to open the Completion
tab at the bottom of the work order. Show me
-

- Choose a category
from the Repair Category drop-down list.
- Choose a code from
the Repair Code drop-down list, if applicable.
- Enter any relevant work order
notes in the Completion Notes text-entry field.
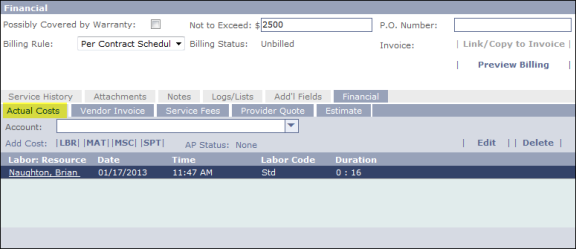
- On the Complete Work Order popup screen again, click the Costs button to open the Actual Costs
tab. Show me
-

- (Optional) In the Account drop-down list, select a billing account for the work order.
- If you need to edit the labor costs associated with the work order, click the Edit button and then update the fields in the Time Record popup screen that appears. When you are finished, click OK to update the time record for the work order.
- Add or update costs for labor, materials, miscellaneous items, and/or spot purchases by clicking the following links and then entering the relevant costs and details on the screens that appear:
|
Labor
|
L
|
LBR
|
|
Materials
|
M
|
MAT
|
|
Miscellaneous
|
*
|
MSC
|
|
Spot Purchases
|
P
|
SPT
|
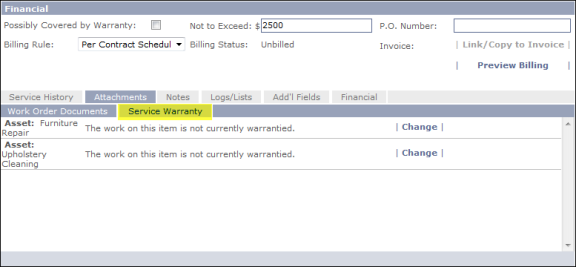
- (Optional) On the Complete Work Order screen again, click the Add Warranty button to open the Service Warranty tab. Show me

- Click the Change button to the right of the
asset you want to add a warranty to a work order item.
- The
list of warranties associated with your organization appears. Choose a warranty template from the list or
select the Ad Hoc Warranty option to create a warranty from scratch.
Note: For details on how to create an ad-hoc warranty, refer to the Create an Ad Hoc Warranty section of this guide.
- When you are finished providing all of the required information for the work order, click the Finish button on the Complete Work Order popup screen.
- The
work order is saved and the status displayed on the Work Order details screen changes to Completed.