Create a Warranty
To create a service warranty, the following must be true:
- You must have already created the organization
the warranty is to be associated with.
- The Warranty module must be activated in CorrigoNet.
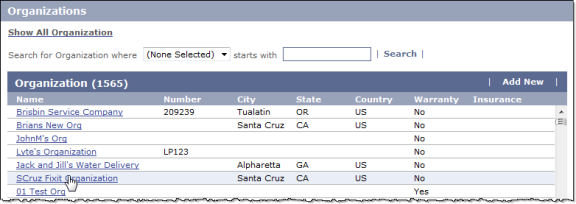
- Note: You can tell if the Warranty module is activate or not by going to User > Organizations and clicking the Show All Organization link. If a Warranty column appears between the Country and Insurance columns in the Organization table, the module is active. If the column does not appear, contact your CorrigoNet System Administrator to request that the module be activated.
- Your role must have been granted the Personnel-Organization
privilege.
To create a new service warranty, complete the following steps:
- Click the User tab.
- Click the Organizations option from the drop-down list that appears.
The
Organization Search screen opens..
- Click the Show All Organization link or use the search features
to focus your search.
- Double-click the organization you want to create
the warranty for. Show me

The
Organization details screen opens.
- Choose Warranties from the tools drop-down list
near the bottom of the screen. Show me

- Click the Add Warranty button that appears in the Warranties row.
The
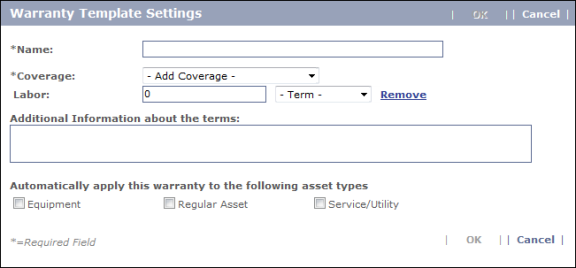
Warranty Template Settings screen opens. Show me

- Enter a name for this warranty template in the
Name field.
- Add at least one coverage type by choosing from
the Coverage drop-down list. The following options are available:
- Labor
- Materials
- Miscellaneous
- Services
- Spot Purchases
- Other
- As you select each coverage type, a
line item appears in the field below. For each coverage type, specify the duration of coverage in the first field and then choose a coverage term
from the drop-down list. For
example, for Labor enter 30 in the first field, and choose Day from the
list if labor is to be covered for 30 days under this warranty. Show me

- Type any pertinent information about the warranty in the text-entry field below the Coverage section.
- If you want the warranty to automatically apply to all of the organization's assets of a given type, select the asset type or types by selecting any or all of the check boxes at the bottom of the screen:
- Equipment
- Regular Asset
- Service/Utility
- Click OK when you are done.
The warranty is then added to the organization's record in the system.