Assign a User to Work Zones
By default, the work zones a user has access to are determined by the team or teams the user is assigned to. The following procedure should be used if you want to give the user access to additional work
zones: that is, work zones that are not associated with any of the teams the user belongs to.
To give a user access to specific work zones, complete the following steps:
- Go to User > Manage Users.
The Users screen opens.
- Click the Show All Users link or use the search feature to find the user you want. Use
the scope selector to focus your search.
- Double-click the name of the user who you want to assign to additional work zones.
The User
Details screen opens.
By default, the bottom half of the screen should show the Contact Notifications panel.
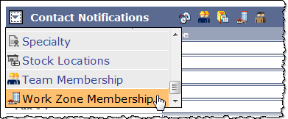
- Click the down arrow beside the Contact Notifications heading and select Work Zone Membership from the drop-down list that appears. Show me

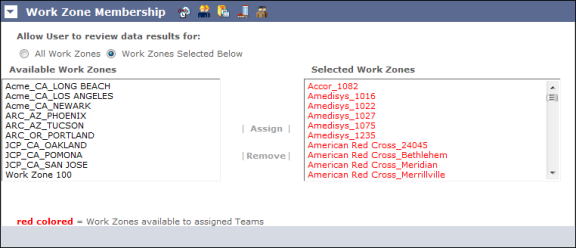
- On the Work Zone Membership panel that appears, click one of the following radio buttons:
- All Work Zones— Lets the
user view data for all work zones
- Work Zones Selected Below—Lets the user view data for
specific additional work zones.
- If you selected the first option above, jump to Step 8. If you selected the second option, two new fields appear on the screen. Show me

- Complete the following additional steps:
- In the Available Work Zones field, select all of the work zones that you want to assign the user to.
- Click the Assign button to move the work zones into the Selected Work Zone field.
- Click the Save button at the top of the screen when you are finished.