Add a Document to an Asset
You can add documents like manufacturers' warranties to assets by completing the following steps:
- Go to Assets > Asset Builder.
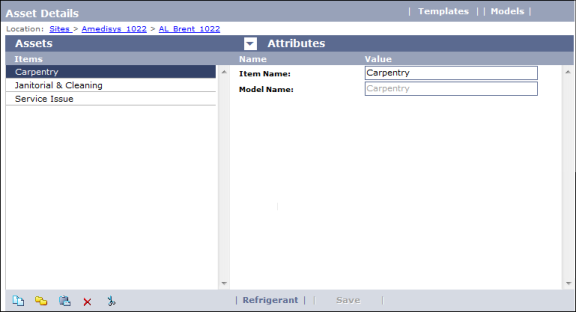
- The
Asset Details screen opens. Show me

- In the Items column, drill down to the asset you want to add a document
to.
- Click the
 button beside the word Attributes and then select the Documents option from the drop-down list that appears.
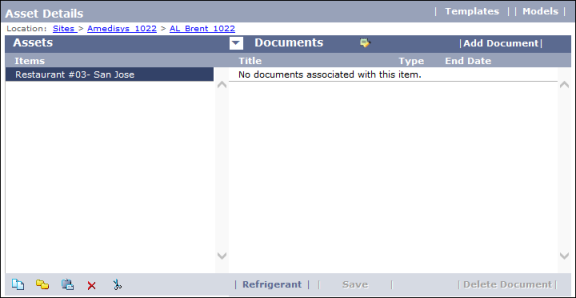
The
Document panel opens. Show me

- Click the Add Document button.
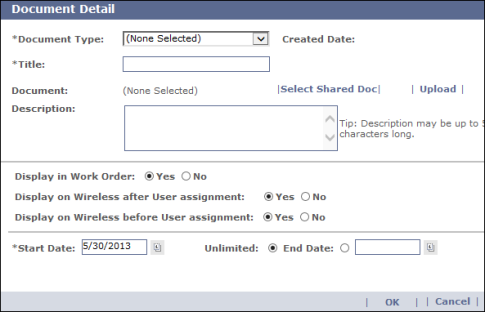
- On the Document Detail popup screen that appears, select the type of document you want to add to the asset. Show me

Note: This list is configurable, but usually includes options like Lease, Picture, Service Contract, Professional Services Document, Warranty, and so on.
- Enter a name for the document in the Title field.
- Do one of the following:
- Click the Select Shared Doc link if the document already exists in the system and you just need to associate it with the current asset.
- Click Upload if the document is new to the system. If you click this option, click the Browse button on the Upload Document popup screen and then navigate to and select the document.
- If you want the document to be available to other users and for other assets, click the Yes radio button in the Shared field, otherwise, click No.
- Back on the Document Detail screen, click the Yes or No radio button for the following options:
- Display in Work Order
- Display on Wireless after User assignment
- Display on Wireless before User assignment
- (Optional) If you are entering a lease, warranty, or other document with fixed start and/or end dates, enter that information in the Start Date and End Date fields. If there is no end date, click the Unlimited radio button.
- Click OK to add the document to the asset.