Grant URL and AP Financial Privileges
System privileges
are granted to roles, and then each user is assigned to a specific
role, thereby taking on the privileges
granted to that role. The
privileges
are granted according to the CorrigoNet menus and the individual
items on those menus. As a result, you are only be able to access those parts of the system that your user role has been granted
privileges
for. If you do not have the necessary privileges
for a specific feature or function, that element does not appear in your instance of the application.
Note: Because user privileges
are based on roles, the ability to access the Role Administration functionality is normally restricted to a small group of users. Otherwise, users with limited privileges
in the system could simply go to the Role Administration screen and grant themselves unlimited privileges.
If you are an authorized user, you can grant privileges
by completing the following steps:
- Go to User > Role Administration > List.
- The Role
screen opens.
- Click the All button to view all roles in the system or use the search fields to find the specific role whose permissions you want to change.
- The
Role displays all of the roles in the system or all of the roles that match your search criteria.
- Click the name of the role whose permissions you want to change.
The
Role Summary screen opens. Show me

- In the URL Privileges section, click the Edit button.
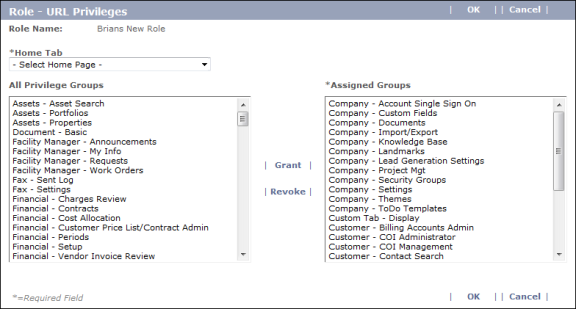
- The Role- URL
Privileges screen opens.
- Use the Grant and Revoke buttons on the screen to move privileges to and from the Assigned Groups field, which represents the permissions the user is being granted. Show me

- When you have finished making your selections,
click OK to save your changes and return to the Role Summary screen.
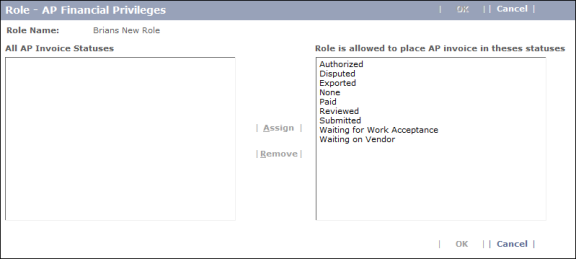
- (Optional) In the AP Financial Privileges section, click the Edit button.
- Repeat steps 6 and 7 above to grant or revoke the user's right to place an AP invoice in different statuses, then click OK to save your changes. Show me
