Create a Model
Models
are representations of physical assets and
provide the physical context and basic information about the assets referenced
by work orders and to be serviced by your field technicians. Models
can represent virtually any asset in the real world.
Each model has a set of attributes
and tasks associated with it. The
attributes define the model and the tasks are text descriptions of work
that can be performed on the asset that the model represents.
|
Note:
|
Before
starting to create a model, make you have created your specialties
and attributes
first. |
To create a new model, complete the following steps:
- Go to Our Company > Knowledge Base > Models.
- On the
Models search screen that appears, click the Add New button.
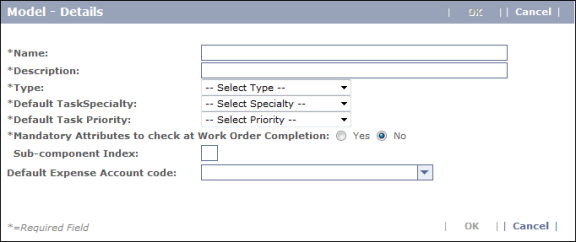
The
Model - Details screen opens. Show me

- Type a name for the model in the Name field. The
name should be descriptive, but generic because it will be customized when it is added to inventories later. For
example, you might create a model called "Office." Later
when you are adding inventory
to work zones, you can create "Executive Office," and "General Office" assets from this model.
- Select a type from the Type drop-down list. For
an office model, select the "Regular Asset" type.
Note: For descriptions of the different model types that exist by default in the system, refer to the Model Types section of this guide.
- Select a specialty
from the Default Task Specialty drop-down list. For
a model covering locks, for example, you might want to have a locksmith service specialty.
- Select a default priority for any task that contains this asset. Note that the priority can be changed manually when the asset is added to a work order, so this field is more of a guideline than a rule.
- Click the Yes radio button in the "Mandatory Attributes to check at Work Order completion" field if you want to make it a requirement that all attributes associated with the asset model are addressed before a work order can be marked as Complete. If you leave the field set to the default, No, then it will be possible for a work order to reach a completed status even if some of the attributes have not been completed.
- (Optional) Select a default expense account code that will be associated with the asset model in the system.
- When you are done creating the asset model,
click OK.
The
Model Summary screen opens, displaying a summary of the asset model details and the attributes, tasks, and images associated with it in the system. Show me

- Click the Edit button in the Attributes heading row.
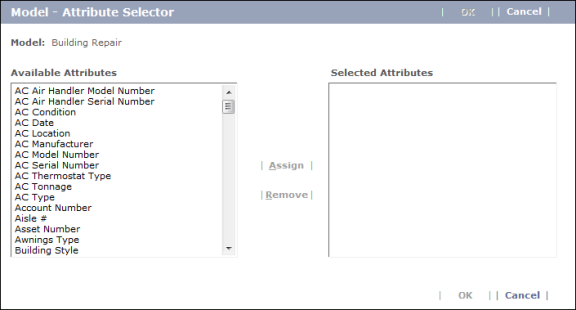
The Model - Attribute
Selector screen opens. Show me

- In the Available Attributes field, select the attributes you want to associate with the model, then click Assign to move them to the Selected Attributes field.
Note: To select multiple attributes, hold
down the Ctrl key and then click the attributes you want to add, then click
Assign. The
attributes are added to the Selected Attributes list.
- Click OK to add the attributes to the model.
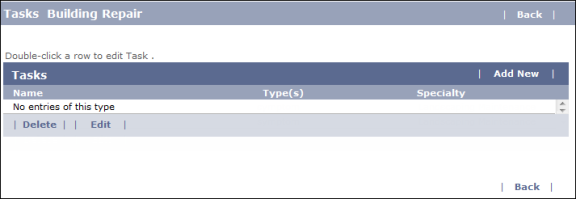
- On the Model Summary screen again, click the Edit button in the Tasks heading row.
The Tasks screen opens. Show me

- Click the Add New button.
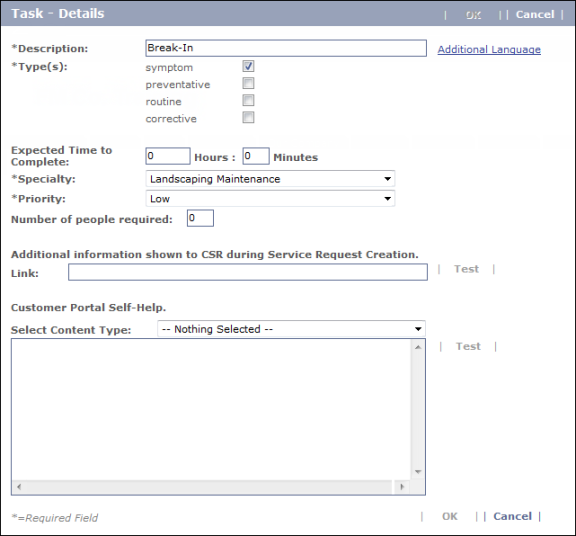
The
Task Details screen opens. Show me

- Complete the following required fields.
- Description—Provide a description of the task
or symptom.
- Type(s)—Select the category of
symptom or task: symptom (asset exhibits some dysfunction that needs repair);
preventive (task is preventive maintenance such as periodic replacement
of a part); routine (regular task done on a schedule, like cleaning restroom);
corrective (e.g., a repair).
- Specialty—Select the service specialty
that should be used as a default for this task or symptom.
- Priority—Rank the severity
of the task or symptom.
- Click OK when you are done.
The task is then added to the Tasks screen. Show me

- Repeat the procedure to add any other tasks you want to the model, then click the Back button on the Tasks screen to return to the Model Summary screen.